Today we’re going to tear down the new flagship killer from OnePlus -- the OnePlus 3, luckily this phone is not that hard to disassemble, which makes it easier for us to repair it when your phone screen got cracked/broken by accident, or when you needed a new battery replacement. Now let’s walk you through a step by step repair guide for the OnePlus 3.
Tools needed:
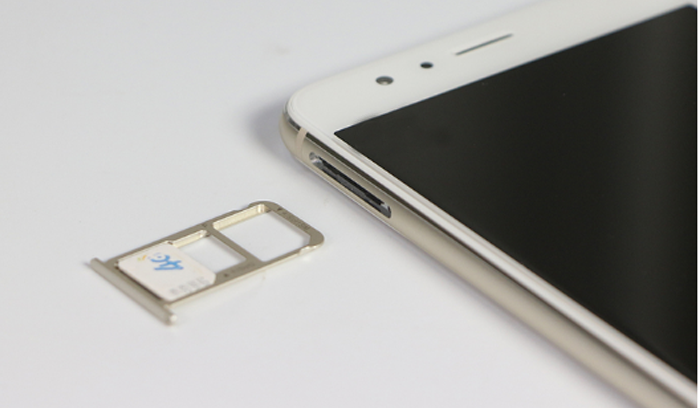
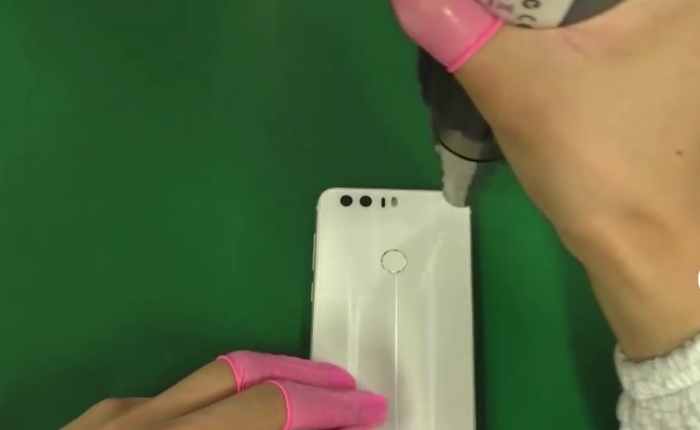
Step 1 Power off the phone and remove SIM card tray
The first thing we’re going to do is to power off the phone before any repair work, and by the way take out the SIM card tray.
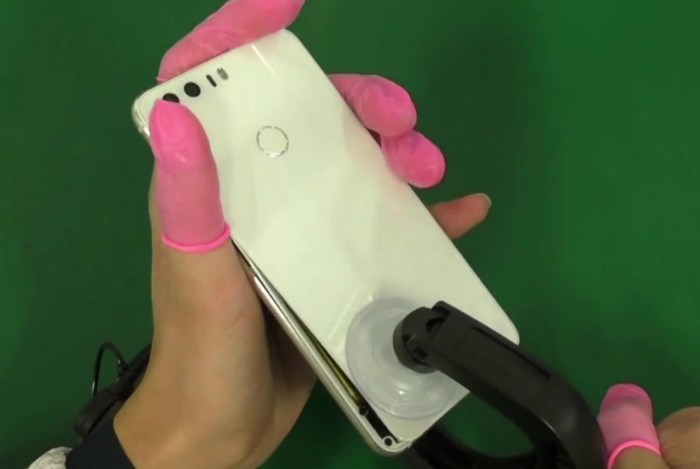
Step 2 Remove rear cover
Undo 2 T2 screws along the bottom of the phone first, similar to iPhone here.
Then you can pry up the rear cover by a metal opening tool or plastic spudger. Take your time, be careful not to scratch the metal rear cover.
After slide along the rear housing cover, you can separate the rear housing and the front screen assembly now.
Take a look at the rear housing, the vibrator is within the rear cover.
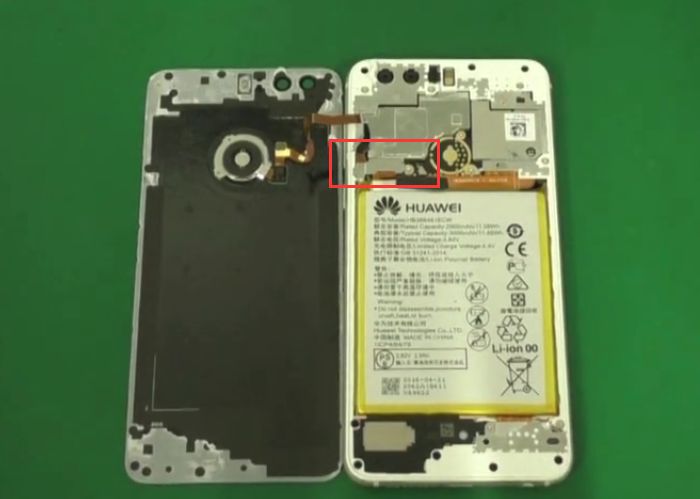
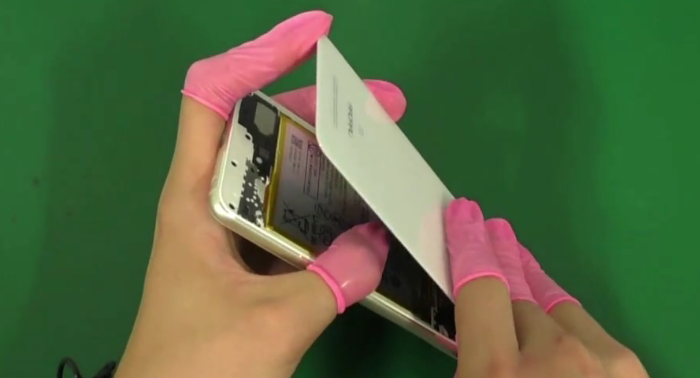
Step 3 Remove battery
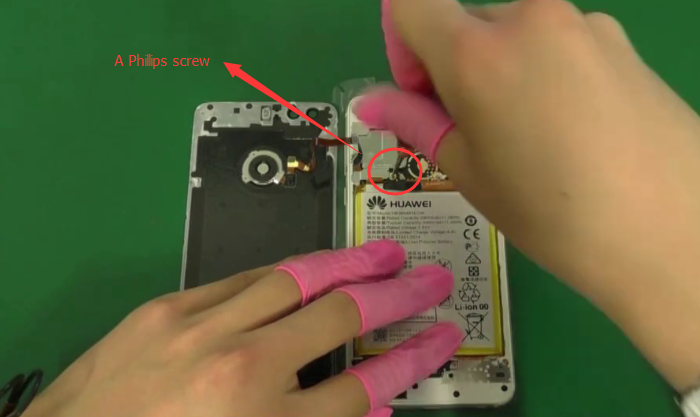
First undo 1 Phillips screw here and remove the protective bracket cover.
Remove the battery connector.
Next release the 2 extension cable flex connectors.
And there is one little piece of tape along the top of the battery, remove it.
Now it’s time to remove battery, you can pry the battery out from the pull tab of the battery, easy job, battery out. Not like the red battery in oneplus 1 and oneplus 2, the OnePlus 3’s battery is black.
Step 4 Remove charging port module
Undo 7 screws in the charging port module by Phillips screwdriver.
And then we’re going to remove the wire cable, charging port cable and fingerprint sensor ribbon cable.
Now the charging port can pop out, it comes with the headphone jack, loudspeaker and USB type c connector.
Step 5 Remove motherboard
Move to the motherboard, you need to release the wire cable and screen cable first.
Then there are 8 screws remaining here, remove all of them, keep them organized since the screws are not all the same.
Now you can pry out the motherboard or you can just use your fingers to take it out.
On top of the front frame, underneath the mainboard, the ear speaker is standing over there.
On the motherboard, you can try to remove the front-facing camera and the rear camera. Just disconnect their connectors and you can take it off easily.
Left the front screen assembly with frame now.
Here you can see the front frame is plastic and thin, which adds more difficulties to separate it with the LCD touch screen.
So, we’d better leave it here if you are not confident with your repair skills.
This is almost the whole tear down work. Next, we’re going to reassemble this phone.
We’ll start with the motherboard here.
Put rear and front facing camera back
After that, the whole motherboard can be pressed down into the frame.
Then we got the screen cable flex connector and wire cable flex connector to reconnect.
And also 8 screws to be fastened, make sure they go into the exact same hole they came out of.
Next step, put charging port module connector back.
Reconnect the wire cable and the other 2 flex cable well.
Also there are 7 screws need to be fastened here.
Next, put battery back
You’d better put the little piece tape back though it’s not that important.
Reconnect the extension flex cable and put back the little metal bracket.
And hold it down with the screw back.
Before install the rear cover, you’d better check whether the screen works well by power on the phone.
If everything is going well, then you can move to the next step.
Put the screen assembly back to the rear cover panel, here you can turn off the phone.
Put the top side in first and pinch down the sides and the bottom. Don’t put too much pressure on it in case you broken the screen.
Now the only thing you need to do is to put these 2 T2 screws at the bottom in place.
Till now everything is going well, so are you ready to do the repair job by you own? If you have any questions just leave a comment below to let us know!
 Note:
Note: